Pages

Saturday 22 February 2014

Paneer Jalfrezi/ Mixed Vegetable Jalfrezi

Here comes another recipe, best suited side dish for roti/ phulkas/ nan or any Indian flat breads. This is definitely a nutritious recipe because of the addition of many vegetables. I love it when any recipe calls for healthy ingredients and when it comes out tasty, I make sure it is made often :-).

I am not a big fan of veggies or paneer but when made with perfect spices I like it a lot :-). I especially love this dish for the tangy taste it gives to my taste buds. But you can also adjust the tanginess and play with spices :-). Now over to the recipe...


Ingredients :
serves-2

Paneer - 250 gms
Tomato - 1
Onion - 2 julienned
Ginger Garlic paste - 1 tsp
Tomato sauce - 1 tsp

Spice Powders

Coriander Powder - 1 tsp
Chilli Powder - 1/2 tsp
Garam masala powder - 1/2 tsp
Turmeric powder - 1/4 tsp
Salt - to taste
Kasuri Methi - 1/2 tsp (dried)

Vegetables

Beans - 5 to 6
Carrot - 1
Tomato - 1 deseeded
Capsicum - 1/2

Seasoning

Oil - 1 1/2 tsp
Cumin seeds - 1 tsp

Garnish

Lemon wedges

Preparation

1. Puree one tomato in a blender. Strain it in a strainer and keep aside.
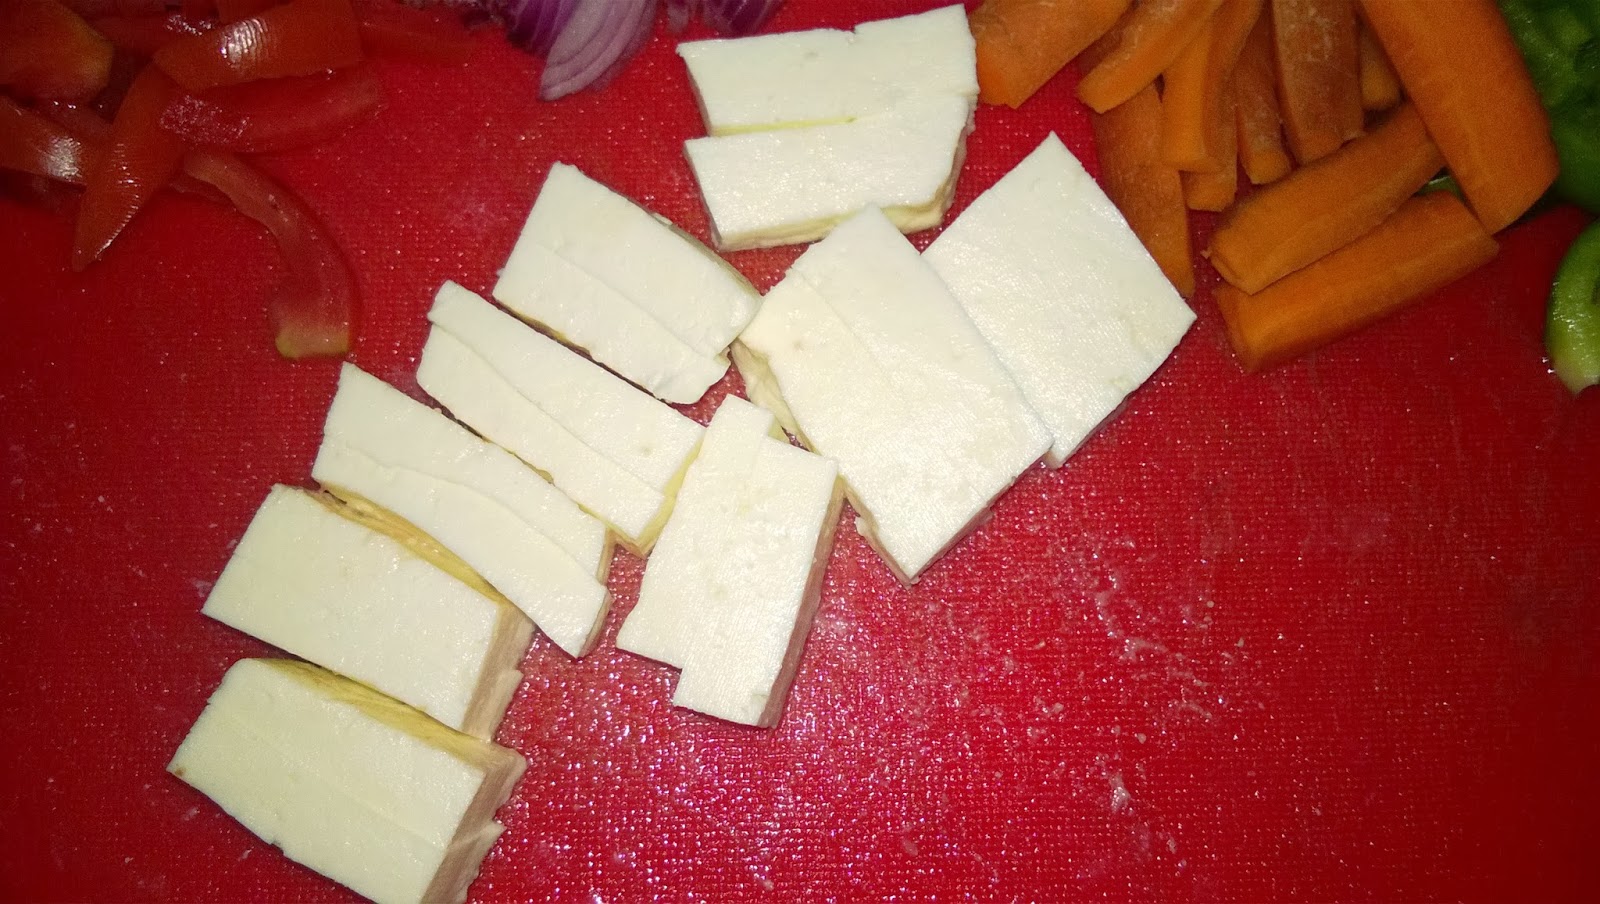
2. Cut all the vegetables into julienne including paneer.


3. Par Boil beans in a little water for 10 mins and keep aside.


Method

1. Heat oil in a pan and when hot, add cumin seeds and let it crackle.

2. When the cumin seeds splutters, add julienned onions and saute till brown.

3. Add ginger garlic paste and saute for 2-3 mins till the raw smell of ginger garlic leaves.

4. Add all dry powders and saute till the masalas get blended well.

5. Now add tomato puree and saute till oil leaves the sides of the pan.

6. Add tomato sauce and mix well.

7. Now add the cooked par boiled beans and carrot and cook covered adding 2-3 tsp water for 3-4 mins on medium flame stirring occasionally.

8. Now add the capsicum and julienned tomatoes and mix well. Do not let the vegetables to get over cooked.

9. Add paneer and mix till the masalas coat well with the paneer and cook covered for another 3 mins.

10. Finally add crushed kasuri methi and some love as always :-D and mix well.


11. Server hot with Lemon wedges.

Note :

1. Since beans take a long time to get cooked, we par boil them before hand with a little water. Other vegetables get cooked in the curry themselves.
2. Retain the crunchiness of the vegetables. Do not overcook. The key to tasty Jalfrezi is crunchy veggies.
3. Adding tomato sauce enhances the tanginess of the curry. You can omit it if you do not like your curry to be tangy. I personally love tanginess so I added 1 tsp, moreover you can also reduce the amount and ajust to your taste buds.
4. I use only home made chilli powder which is very spicy so I had to add only 1/2 tsp. So add according to the type of chilli powder you use.
5. If you do not have kasuri methi, you can omit this step but it enhances the flavor of the complete dish.

If you found this post useful, share it on your Facebook page.

Please do like my Facebook page, join me on Google+, follow me on twitter or pin me on Pinterest to get more updates from Sash's Exotica :-)

Please don't forget to leave your comments and suggest recipe ideas! Love you folks! :D


Monday 30 December 2013

Potato Masala Curry (for Chapati)


A classic Potato Curry is the best pair for chapati or roti, just as how pepper & salt or bread & jam are the perfect match for each other. Today I'm revealing the secret recipe of my mom's yummy, tangy potato curry which brings back so many memories just as I think about it. 

Wow!!! Look at this! Doesn't it look mouth watering!!! :D


Ingredients:
Serves: 4
Preparation Time: 10 mins
Cooking Time: 10 mins

Potatoes - 3/4 whole
Onion - 1
Green Chili -3
Curry Leaves - few
Coriander Leaves - chopped 1 tsp
Water - 1 cup
Turmeric Powder - 1/4 tsp
Salt
Mustard Seeds - 1/2 tsp
Cooking Oil - 2 tsp

Preparation:
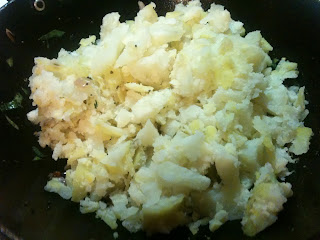
1. Take a pressure cooker and fill it with water half-way through and put the cleansed potatoes, some turmeric (and a smashed slice ginger if needed*). Boil the potatoes well enough to make smashed potatoes (about 4 whistles).
* Here's another secret: Adding ginger in the cooker along with potatoes while boiling will help prevent gastric trouble. :)

Save the excess water after boiling. This water has plenty of nutrients that got drained from the potato while it was in the process of being boiled. We will use this later


2. Chop onions, green chili, curry leaves and curry leaves and set them aside.


Method:

1. Take a wok (or Kadai) and pour some oil. Sprinkle some black mustard seeds. Wait until you hear some pops. 

2. Add the chopped onion, chili, curry leaves to the wok and stir until the onion become mildly brown. 


 3. Now add potatoes to the wok and fry it for few seconds.

4. Pour the excess "nutrient water" we saved. If needed add some water according to the desired consistency. Let the water boil.
5. Add some Turmeric powder and some love ;) to make the curry more healthier, tangier and colorful!

6. Simmer down for 2 minutes until the curry reaches desired consistency. Now the curry is ready! 

Bravo! You have just learned how to make one of India's authentic delicacies that will surely make your tastes buds dance in joy!


Enjoy this along with warm chapati, roti, parata or even sandwich it in between two slices of bread! Bon Appetite! :)

If you found this post useful, share it on your Facebook page.

Please do like my Facebook page, join me on Google+, follow me on twitter or pin me on Pinterest to get more updates from Sash's Exotica :-)

Please don't forget to leave your comments and suggest recipe ideas! Love you folks! :D

With Love,
Chef Priya & Chef Sash. 


Tomato Soup

Welcoming the winter, holiday season brings in so much happiness every year throughout the world. Who doesn't love having a hot soup watching festival decors during the winter holidays?? That is what exactly I am doing at this moment while I draft this post. This sumptuous soup is perfect for a cold evening with a fried snack or it can be a meal on its own.

I do not like adding too many ingredients in a soup. To me a soup is a comforting meal which has no strong ingredients in it. So I made it simpler but people who prefer using masalas can also add them. (Refer Notes)


Tomatoes: 

1. A substance called lycopene, which is responsible for tomatoes red color, is thought to be the reason for this cancer protective effect.
2. Tomatoes are high in important antioxidants such as vitamin C and Vitamin A. 
3. Tomatoes contain important nutrients, such as niacin, folate and vitamin B6, that have associated with the reduction of heart disease risk. 
4. Another study showed that drinking 8 ounces of tomato juice daily, reduced platelet aggregation significantly, among study subjects. 

Ingredients :

Serves: 2
Preparation time : 1 min
Cooking time : 20 mins

Tomatoes - 4 large

Garlic - 3 pods
Onion - 1 medium sized
Butter - 1 tsp
Maida - 1 tsp
Water - 1 cup

Preparation:


1. Chop onions, garlic and tomatoes roughly and keep it aside. 


Method:


1. Heat a pressure cooker and add a tsp of butter. Add chopped onion and saute for a few seconds.

2. Add chopped garlic and saute for a min.
3. Add roughly chopped tomatoes and saute till they turn mushy.
4. Now add a cup of water and close the lid of the pressure cooker and cook for 1 whistle.


5. After it cools, puree it in a blender. 

6. Strain the blended mixture in a strainer to remove the seeds.
7. In a pan, melt butter and add maida to it. Keep stirring continuously to avoid lump formation.
8. Now add in the strained soup, add salt and pepper and allow it to boil for a min.


Notes :


1. You can add cream and bread croutons to make it a restaurant style tomato soup. It is purely optional as people who are health conscious can avoid adding cream.

2. If you do not have a pressure cooker you can also boil the tomatoes in an open pan.
3. Adding maida is only to thicken the soup. If you like the soup to be watery you can avoid the addition of maida.
4. Do not forget to strain the blended mixture to strain the seeds and the pulp of tomatoes.
5. If you want to add masalas to the soup to make it even more flavorful, you can add whole garam masalas/ a tsp of garam masala powder after step 7 and saute and continue with step 8.


If you found this post useful, share it on your Facebook page.

Please do like my Facebook page, join me on Google+, follow me on twitter or pin me on Pinterest to get more updates from Sash's Exotica :-)

Please don't forget to leave your comments and suggest recipe ideas! Love you folks! :D

Bye :-)


Saturday 14 September 2013

Easy Kerala Chicken Roast

There are many versions of Kerala Chicken roast recipe which is done differently in different parts of Kerala. This is one recipe which I saw in a malayalam cookery show. I altered the recipe a bit to suit my taste buds.


This is a very easy chicken gravy where all ingredients are added into the the vessel in which you are going to prepare this gravy, marinate in the same vessel and put it directly on stove. There is no need to saute any ingredient. This is a perfect chicken gravy which can be done by bachelors and working women because there is no elaborate cooking required.


Coming to the recipe, there are two ways in which this recipe is cooked. You can either put in a cookware and cook the chicken or you can alternatively put the marinated chicken in the cooker and cook for 1 whistle.


Ingredients :

Chicken - 1/2 kg cleaned
Onion - 1 chopped
Tomato - 1 chopped
Ginger garlic paste - 1 1/2 tsp
Curry leaves - few
Coriander leaves - 1 tsp chopped
Oil - 3 tsp
Salt - to taste

Spice Powders :

Turmeric powder - 1/4 tsp
Chilli Powder - 1 tsp
Coriander powder - 1 1/2 tsp
Pepper powder - 1/2 tsp
Garam masala powder - 1/2 tsp

Preparation :

1. Peel onions and chop onions finely and keep it ready.
2. Chop tomato, coriander leaves finely and keep aside.
3. Clean chicken and cut it into bite sized pieces.

Method :

1. Take a wide vessel and add cleaned chicken, add in all the spice powders, chopped onion, chopped tomato, curry leaves, ginger garlic paste, salt and oil.
added spice powders to chicken


added chopped onions


added chopped tomato


added curry leaves and ginger garlic paste


added oil

2. Mix all the ingredients well with your hand and marinate it for 30 mins to 1 hr.


3. Close the vessel with a tight lid and cook everything in medium flame till the masala gets blended well in the chicken. This takes approximately 20 mins.

4. Then cook uncovered for 10 mins or until all water gets evaporated and a thick gravy is left behind, add coriander leaves and mix well. Check for salt and pepper powder.
5. Chicken roast is ready to be served now. Serve it as an accompaniment for rice, roti, phulkas or any bread.

Note:

1. You can cook it in a cooker for 1 whistle. This method saves time so if you run out of time, you can try this method.
2. Do not forget to marinate the chicken. Marinating the chicken will turn the chicken juicy and soft.
3. Add coriander leaves at the last and mix for enhanced flavor. The entire cooking procedure should be in medium flame.
4. Adjust salt according to your taste. If you find the dish to be less spicy, add pepper powder instead of chilli powder. The main flavor of the chicken roast lies in the chicken cooked in pepper powder.
5. I used 3 tsp of coconut oil during marination, because I like the flavor of coconut oil. You can use any vegetable oil.


I hope you liked this post :-)
If you found this post useful, share it on your Facebook page.

Please do like my Facebook page, join me on Google+, follow me on twitter or pin me on Pinterest to get more updates from Cookgramam :-)

Bye :-)


Monday 9 September 2013

Falooda Recipe with step by step pics

When I started this blog, I promised myself that I will be posting two days a week. But, I sinned. My busy schedule keeps me engaged all the time giving me no time to spend on things I love to do, yea, cooking!!! Though I tried many recipes, I had no time to click pictures or to do any restaurant reviews.

My dream is to be a full time blogger someday, mastering almost all Indian Recipes and to publish books on Indian cuisine. I regret for having been a procrastinator at the very first step in accomplishing my dream as a full time blogger.

Coming to the recipe, today I will be briefing about how I got introduced to this recipe and the method of preparation in detail. This Falooda is a perfect party time dessert recipe where everything is prepared already and you just need to assemble everything in a glass. Sounds easy right?? 

Though I have ordered this Falooda in many restaurants, I never had the urge to try this at home until I heard my aunt who made this at home. She told the entire procedure in phone and I registered it in my brains instantly :-). This recipe calls for certain complex ingredients so I'll be telling you where I got these from, so if you are residing in Chennai you can get it from where I got.


The Falooda glasses MUST be narrow and transparent. If you use a wide glass the layers will collapse making the Falooda clumsy. The beauty of this recipe lies in the colorful layers built up in a narrow tall glass. Try to use spoons in the length of the glasses as it will be easy to take out the layers at the last and of course gives you a restaurant Falooda feeling :-). I bought these Falooda glasses and spoons from Currimbhoys in Parrys, Chennai.

Basil seeds / Sabza seeds - My aunt got these seeds from Nilgiris, but I didn't get it in Nilgiris so I bought it from a supermarket next to my house. You can try getting it in any Nilgiris outlet or any supermarket.

The other ingredients can be bought in any supermarket.

Serves - 2
Ingredients:

Jelly crystals packet - 1 
Basil seeds / Sabza seeds - 1 tsp
Tutty fruity - 1 tsp
Chopped Nuts - 1 tsp
Milk - 1 cup
Rose essence - 3 drops
Icecream - 1 or 2 scoops ( any flavor )
Cherry - 2
Fruits - 3 tsp ( fruits of your choice )
Milk - 1 cup
Vermicelli - 1/4 cup
Yellow food color - a small pinch
Powdered sugar - 5 tsp

Preparation :

1. Soak a tsp of Sabza seeds in a cup of hot water till it bulges. Drain excess water and keep aside.

2. Prepare jelly as per directions given in the packet and keep aside.

3. Chop nuts and fruits. Take a tsp of tutty fruity and cherry and keep it ready.

4. Cook vermicelli in milk till soft. Strain milk from the vermicelli.
5. Add a pinch of orange food color to the cooked vermicelli and keep aside.
6. To the milk add 3 drops of rose essence and keep it ready.


Method of preparation :
1. Chop the prepared jelly (refer point 2 under Preparation) and arrange it in the glass at the bottom of the glass.

2. Layer it with 3 tsp of Sabza seeds (refer point 1 under Preparation).

3. Next, layer with 2 tbsp of cooked and prepared vermicelli (refer point 4 under Preparation).

4. Next layer it with 3 tsp of chopped fruits. I used apple and banana.

6. Pour the prepared rose milk to the layered falooda.
7. Finally add 2 or 3 scoops of ice cream.
8. Add chopped nuts, tutty fruity and a cherry on top.


Note :
1. You can add chopped nuts of your choice. I added chopped cashews, almonds, walnuts and raisins.
2. You can choose your choice of fruits. I used
3. There are many flavors of jelly crystals available in the market. I used Raspberry flavor. Do try it with different flavors.
4. The vermicelli should not be mushy so do not overcook.
5. 1 tsp of sabza seeds yeild 4 tsp when soaked so take care not to add too much.
6. I used store bought ice cream. The flavor of the ice cream is also your choice.
7. You can also add 1 tsp of chocolate fudge on top of the ice cream or any other essence, again it is purely your choice.
8. Serve it immediately after layering.


I hope you liked this post :-)
If you found this post useful, share it on your Facebook page.

Please do like my Facebook page, join me on Google+, follow me on twitter or pin me on Pinterest to get more updates from Cookgramam :-)

Bye :-)